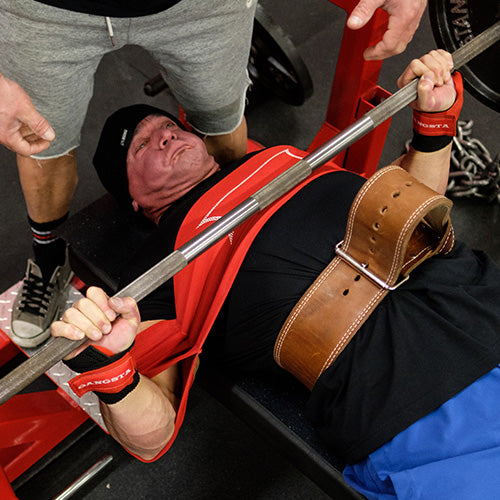
Bench Press Sling Shot by Body Reapers
The Bench Press Sling Shot by Body Reapers is designed to take your strength training to the next level. This Sling Shot uses sturdy, long-lasting nylon fabric to help you lift more weight while maintaining proper form
Posted 8 meses in Otro.
The Best Damn Bench Press Article for Physios, Period!
For such a popular exercise, it is more technically complex than people give it credit for and I’m amazed how many people perform it improperly. While I’m never a fan of demonizing any exercise, the bench press is the one I see the most issues with. These issues are likely a combination of different variables (i.e. poor programming/technique, too much weight, other variables described below) that reared their ugly head while benching. Nonetheless, in this continuation of my “Best Damn” series I discuss how to coach, cue and modify the bench press Best Slingshot For Bench Press.

Getting a list of disclaimers out of the way:
Part 1: Setup – from top to bottom
Position of head under bar
International Powerlifting Federation (IPF) former world record holder Mark Giffin taught me to have my nose under the bar when unracking it and I recommend this for clients. This shortens the distance you have to move the bar to get it over your chest.
I am a firm believer in the shoulder blades ‘’down and back’’ position specifically when bench pressing in a strength context. For painfree people who are using the bench press as a hypertrophy exercise, I’m not as particular. However, for those who have shoulder pain and/or want to do bench press for strength (or strength & hypertrophy combined), tucking the shoulder blades works well.
Tucked vs flared elbows
In general, I recommend gripping the bar in a position where at the bottom of the movement your wrists are in line with your elbows. You should aim to touch the bar onto your lower chest/sternum with your arms at a 30 to 45 degree angle from your body.
This comes down to several factors:
1) The rules of the federation you compete in: Some federations allow you to tuck your feet underneath you in order to have a larger arch whereas others (such as the IPF where I competed) require you to have your feet on the ground.
Side note: when working in sports rehab, the rules of the federation or sporting league are an underrated yet extremely important component for rehab and return to play. For more info on sports rehab, I’d recommend checking out the Exercise Prescription In Sports Rehab Masterclass by Teddy Wilsey.
2) Injury History: Clients with back pain and/or hip pathology (e.g. FAI or labral issues) that can be aggravated by lumbar extension would be wise to minimize lumbar extension while still keeping the chest up and getting proper scapular position.
3) Goals: If you’re trying to push higher numbers, then a higher arch is likely the way to go.
Another less known consideration I discovered with myself and other clients is that for some people a higher arch can actually create less stability. For these people there is an upside down U shaped relationship between level of back arch and level of performance. Finding the right degree of arch may require some trial and error.
This follows in from the previous section on arching as having the feet further back will get you into a more arched position whereas having your feet under your knees or out even further will result in a smaller arch.
The other consideration here is foot width. Too wide of a stance can be uncomfortable for the hips and may aggravate those with capsular pathology or people who just don’t have the hip structure to get there. For most people I recommend the feet around shoulder width apart (maybe slightly narrower or slightly wider) but this depends on individual comfort.
Part 2: Coaching common flaws
Lack of tightness – the biggest flaw
I will (only with a broomstick or empty bar bench) also take a page from Dave Tate’s playbook and push against different parts of the body to make sure they’re kept tight (2). If they weren’t tight before you push, they likely will be afterwards. Of course, I don’t recommend doing this when a client is lifting heavy.
Touching too high/too low
Touching too high can put a ton of strain on the shoulders whereas touching too low can be inefficient.
Usually mirror coaching (mirroring what they’re doing wrong and what you want them to do) and having a target to aim for on their chest can help. I sometimes (with the client’s consent) put 1-2 fingers on the client’s chest when benching as a target to aim for but make sure to get your fingers out at the last second!
This usually comes down to making the client aware of proper grip width. I see this in people who are skinnier and in people benching with either an ultra wide or ultra narrow grip.
Wrists not in line with elbows
This usually comes down to lack of awareness, improper grip width, and/or not touching in the right spot (as above). Usually cueing proper tightness and making the client aware of the issues helps with this.
Not able to touch chest
This seems like an odd one but outside of guys with too much weight/ego I see this in another demographic, female lifters. Some female clients who are slender and have smaller chests may have difficulty touching their chest as the amount of shoulder extension mobility needed is much higher than for the barrel chested, stocky powerlifter. Slow eccentrics on exercises like bench press (referred to by some powerlifters as “air boards”) and dips can be helpful.
I occasionally see this in people struggling to learn “proper” technique when benching for strength. Again, having a target to aim for on the chest/sternum can be helpful and partial reps may be needed initially.
I discuss some partial bench press variations in the below video which can be helpful in these situations and for some people with shoulder pain (more on that later).
Part 3: Modifications for clients with injuries
Before making big modifications you need to consider the clients programming. Many of the programming mistakes I see people make in regards to the bench press are:
After proper technique, this comes down to usually lowering the range of motion to a tolerable level or dialing the pressing difficulty back. I discuss this in my article on returning to pressing exercises with shoulder pain (3).
In most cases this comes down to just decreasing the amount of arch used in the back. Some people with hip pain may require changing foot position.
That’s a wrap. I hope this piece improves your confidence with coaching, cueing and modifying the bench press. If you enjoyed this blog then check out Dr. Travis Pollen’s masterclass on Injury Prevention: Theory into Practice. Thanks for reading!
Want to master injury prevention?
“Injury prevention: theory into practice”
Elevate Your Physio Knowledge Every Month!
Get free blogs, infographics, research reviews, podcasts & more.
By entering your email, you agree to receive emails from Physio Network who will send emails according to their privacy policy.


